
In This Article
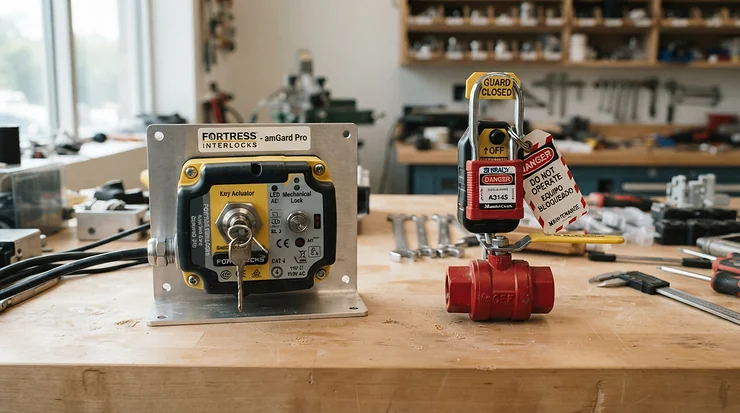
The pawl system vs roller system for kickback safety is a choice between two mechanical ways of stopping a board from flying backward. Pawls are spring-loaded, toothed arms that bite into wood moving the wrong way. Rollers are one-way bearing wheels that spin forward, lock in reverse, and press stock toward the fence.

Kickback doesn’t announce itself. A board wanders a hair off the fence, the back of the blade grabs it, and your lumber becomes a projectile with opinions. The hardware that fights that moment comes in two flavors: sharp pawls hanging off the guard or splitter, and one-way rollers riding the stock beside the blade. Both are legitimate. Neither is magic. They solve different halves of the same problem.
Start with the foundation. A riving knife keeps the kerf from closing on the blade, which is the classic trigger for pinch-style kickback. Pawls and rollers sit on top of that foundation as backup. One stops a board that is already moving backward. The other works to keep it from wandering in the first place.
This guide walks through seven real products: rollers, pawl hardware, and a pawl-friendly accessory. It explains pawl tooth engagement and roller bearing tension in plain English, then finishes with a decision framework you can use at the saw. Everything is built from published specs, manufacturer documentation, and aggregated reviewer commentary. There are no hands-on testing claims and no invented quotes. Where the evidence is thin, we say so. Prices appear as ranges only, because they move constantly.
Quick Comparison: Pawl System vs Roller System for Kickback Safety
| Factor | Pawl System | Roller System |
|---|---|---|
| How it works | Toothed arms hang from the splitter or guard and dig in if stock slides backward | One-way bearing wheels press stock down and toward the fence, locking if it reverses |
| Strongest at | Catching a board already thrown backward on through cuts | Keeping stock tight to the fence so it never wanders |
| Weak spot | Needs a through cut; loses reach on short or narrow stock | Needs a T-slot, T-track, or fence mount; comes off for very thin strips |
| Non-through cuts | Not usable | Praised by reviewers for joinery and molding cuts |
| Best For | Saw owners who want OEM-style backup on standard rips | Repeat rips, router table work, and cuts where fence control matters |
Read the table as a division of labor, not a rivalry. Pawls are the last line of defense on a through cut: useful, but only after something has already gone wrong. Rollers work earlier in the chain, which is why the pawl system vs roller system for kickback safety question usually ends with “both, for different cuts” rather than a single winner.
💬 Just one click — help others make better buying decisions too!😊
Top 7 Picks for Pawl System vs Roller System for Kickback Safety: Expert Analysis
Here is the field at a glance. The lineup spans budget to premium, rollers to pawl hardware, and one accessory that makes pawls easier to live with.
| Product | Mechanism | Price Range | Best For |
|---|---|---|---|
| JessEm Clear-Cut TS Stock Guides | Aluminum one-way rollers | Roughly $100-$200 (check current price) | Fence rippers with T-track |
| JessEm Clear-Cut FLEX Stock Guides | Polymer one-way rollers | Around $100 | Almost any fence via sacrificial wood fence |
| Compass RG-2 | Dual one-way rollers, miter-slot mount | Roughly $180-$280 | Shops with several machines |
| POWERTEC 71935N | Single one-way roller stock guide | Around $60 | Budget buyers testing the roller concept |
| SawStop Anti-Kickback Pawls | Replacement pawl set | Low parts cost (check current price) | Existing SawStop owners |
| Shopsmith 514367 | Riving knife with kickback pawls | Check current price | Shopsmith owners |
| SawStop TSI-SLD | Insert with pawl wear plates | Around $75 | SawStop cast-iron saw owners who run pawls |
The roller products cluster between roughly $60 and $280, and the spread buys you build material and mounting flexibility rather than a fundamentally different mechanism. The pawl items are cheaper individually but only matter if your saw already uses a pawl-equipped guard. If you are buying new protection rather than maintaining old, the rollers are where the real shopping happens.
1. JessEm Clear-Cut TS Stock Guides — all-aluminum hold-down for fence rips
The headline is the metalwork. The guides are CNC-machined from anodized 6000-series aluminum with case-hardened steel axles, so nothing flexes when a board leans on them.
Each roller carries a one-way bearing and sits at a slight angle. It spins forward, locks in reverse, and tugs stock toward the fence while pressing it down. The 3-1/8 inch vertical travel and 13/16 inch maximum stock thickness above the mounting surface reveal the design target: standard three-quarter-inch ripping, not chunky timber.
Based on the spec sheet, this suits anyone ripping repeatedly against a fence with T-track. One reviewer describes setting the track about 20 mm back from the fence edge, placing the guides infeed and outfeed of the blade on its right side, and flipping them up out of the way when not needed. The catch is fence compatibility. One forum owner of a European-style slider needed custom adapters.
Reviewers consistently describe two benefits: stock stays flat on the table, and it stays snug against the fence. A Woodworking Review write-up says the guides force wood against the fence and resist rearward motion when set up as recommended. No large verified review pool turned up, so treat the sentiment as a small, positive sample.
Pros:
- ✅ Rigid anodized aluminum construction
- ✅ Angled rollers steer stock toward the fence
- ✅ Lift out of the way when not needed
Cons:
- ❌ Assumes a fairly standard rip fence
- ❌ Premium price for a hobby shop
Price and verdict: roughly $100-$200 at the time of research, so check current price. Premium metal for premium use, and worth it if you rip daily.
2. JessEm Clear-Cut FLEX Stock Guides — lower price, mounts to almost any fence
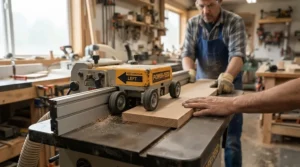
The standout is flexibility. Where the TS version assumes a T-track, the FLEX ships with adapter bolts and plates that let you mount to a sacrificial wood fence, so it works with nearly any rip fence.
The body is glass-filled polyamide instead of aluminum, with one-way roller bearings and case-hardened steel axles. A Fine Woodworking review notes 2-3/4 inches of vertical adjustment and grippy tires angled toward the fence. That means the rollers press the work sideways as you feed, and the reviewer says the one-way design also holds work down and stops it moving backward. The reviewer especially likes them for joinery and molding cuts, where steady downward pressure helps accuracy.
The analytical take: this is the “most buyers should start here” option on paper. You give up some metal heft, but you gain compatibility. The spec comparison shows the same core one-way mechanism as the premium model at roughly a lower price.
Buyer comments on a retailer page, a small sample, say the guides work well on stock wide enough for a push stick and give extra kickback protection and accuracy. One buyer notes removing them for thin strips, which is a real limitation of any roller guide.
Pros:
- ✅ Mounts to T-track or a sacrificial wood fence
- ✅ One-way bearings with 2-3/4 inch adjustment
- ✅ Strong fit for joinery and molding cuts
Cons:
- ❌ Comes off for very thin strips
- ❌ Polymer body feels less substantial than aluminum
Price and verdict: around $100. Best value in the roller category.
3. Compass RG-2 — universal roller guide with dial-set pressure
The standout is the mounting. This guide rides in a standard T-shaped miter slot, so one purchase can serve a table saw, bandsaw, router table, or shaper.
The RG-2 is the taller sibling of the Compass RG-1, adding a second pair of rollers stacked above the first. Fine Woodworking’s reviewer called it better than any featherboard in his shop and noted the doubled height cost only about $20 more. Maker specs list 2-inch polyurethane rollers, about 6.5 inches of travel, and adjustable holding force of 70-100 N, roughly 16 to 22 pounds. Each roller is spring-loaded, so both press on the work even if alignment is imperfect.
Honest take: this is for the multi-machine shop. The one-way rollers let stock move forward but not backward or upward, according to the same review, and the dial makes pressure repeatable.
Aggregated sentiment is strong but seller-hosted. Harvey’s storefront shows 53 of 56 reviews at five stars. Forum owners add caveats: the miter bar didn’t fit a couple of straight bandsaw slots, was too fat for one cabinet saw slot, and one user noticed side-to-side play in the slot.
Pros:
- ✅ Dial-set spring pressure
- ✅ Works across several machines
- ✅ Reversible by flipping the body
Cons:
- ❌ Highest price in the roller group
- ❌ Miter bar doesn’t fit every slot
Price and verdict: roughly $180-$280 depending on model and promotion. Pricey, but cheaper than three separate guides.
4. POWERTEC 71935N — budget roller stock guide
The hook is entry price. This adjustable stock guide with a one-way roller sits around $60, so it works as a low-risk way to test whether roller hold-down fits your workflow.
The listing promises adjustable roller height for different stock thicknesses, a tilt-angle design for straighter cuts, and compatibility with universal T-slot fences. In practice, that tilt means the wheel leans stock toward the fence instead of just pinning it down, the same principle the premium guides use. Materials and bearing specs aren’t documented in the listing we found, so build quality is an open question.
Honest take: it’s aimed at hobbyists with T-track fences who want to add a roller to a simple setup. If you already know you’ll use rollers daily, the premium guides’ documented construction is worth the jump. If you’re curious, this is cheaper than finding out the hard way.
Customer reviews: no verified review pool appeared in the sources checked, so this entry has less evidence behind it than the others. Read current buyer feedback at the retailer before committing.
Pros:
- ✅ Lowest entry cost in the roller group
- ✅ Adjustable roller height
- ✅ T-slot fence compatibility
Cons:
- ❌ Limited verified reviews
- ❌ Materials and bearing specs undocumented
Price and verdict: around $60. A sensible experiment, not a long-term bet.
5. SawStop Anti-Kickback Pawls — OEM replacement pawl set
The standout is simplicity. These are left and right replacement pawls for specific contractor saw guard assemblies, and SawStop’s parts catalog lists them for models including the TSG-MG, JSS-MG, and JSS-RDC, with smaller pawls for other assemblies.
Why it matters: pawl tooth engagement depends on sharp points and free movement. One forum veteran says to keep pawls clean so they dangle freely and keep the points sharp so they dig in. A worn or gummed pawl is decoration. Fine Woodworking’s 2004 SawStop review praised a riving knife with antikickback pawls built into the blade-cover assembly as the best design the reviewer had seen.
Honest analysis: this is a maintenance purchase, not an upgrade. If your saw already uses pawls and they’re rounded or bent, replacement is cheap insurance. Limits are real, though. Pawls don’t work on non-through cuts, and one forum user found a right pawl wedging into the kerf plate when the riving knife was shimmed for alignment.
Individual pawl parts don’t collect reviews, so sentiment here comes from forum discussion of pawl systems generally.
Pros:
- ✅ Restores factory-style backup protection
- ✅ Low-cost wear part
- ✅ Matches your guard assembly exactly
Cons:
- ❌ Useless on non-through cuts
- ❌ Can wedge in the insert if alignment is off
Price and verdict: check current price at SawStop. Small money for restoring a safety feature.
6. Shopsmith 514367 — riving knife with pawls bundled in
The standout is the bundle. Forum posts note that Shopsmith sells a riving knife with kickback pawls as a replacement part, listed under part number 514367. Confirm fit against your Shopsmith manual, since this detail comes from owner discussion rather than a spec sheet.
What it means: you get the pinch-prevention of a riving knife and pawl backup in one piece. One forum poster believes the side pawls help prevent fence-pinch kickback, while the knife handles wood-pinch. Treat that as an owner’s interpretation.
The honest caution comes from Shopsmith’s own patent history. A Shopsmith patent describing a cam-based alternative acknowledges that pawl teeth sometimes fail to engage a workpiece during kickback. That is a useful reminder that pawls are a backup, not a guarantee. Other forum threads report pawl mechanisms sticking and riving knife alignment drifting after a replacement guard arrived. Both problems are fixable, but both are the kind of fiddly detail that explains why pawl owners should inspect the hardware often.
Customer sentiment is limited to forum threads, so no rating can be given.
Pros:
- ✅ Knife and pawls in one assembly
- ✅ Factory-matched for Shopsmith saws
- ✅ Addresses pinch and reverse movement together
Cons:
- ❌ Fit information is mostly owner-reported
- ❌ Pawls can stick without regular cleaning
Price and verdict: check current price. Only relevant if you own the matching saw.
7. SawStop TSI-SLD — zero-clearance insert with pawl wear plates
The standout is the pairing of two details: this tool-free insert has dual metal wear plates for anti-kickback pawls and preformed clearance slots for SawStop’s blade guard and riving knife.
Specs with meaning: it’s a phenolic core with melamine surfaces for low friction, positioning screws for a flush fit, and a locking latch for tool-free removal. It fits ICS, PCS, and CNS cast-iron saws with standard 10-inch blades, so dado sets and non-standard blades need a different insert. The wear plates make sense because pawl teeth ride on the insert, and metal there resists scoring better than a bare phenolic surface (our reasoning, not a maker claim).
Honest take: this is an enabling accessory, not a kickback device. A zero-clearance insert also narrows the gap around the blade, which supports small offcuts. If you run the pawl-equipped guard regularly, it’s a thoughtful upgrade. If you remove pawls often, you’re paying for features you won’t use.
No verified reviews turned up beyond a retailer listing offering a one-year warranty.
Pros:
- ✅ Dedicated wear plates for pawls
- ✅ Tool-free locking latch
- ✅ Slots match SawStop guard and knife
Cons:
- ❌ Standard 10-inch blades only
- ❌ Not designed for jobsite models
Price and verdict: around $75. Fair if you actually use the pawls.
✨ Ready to Upgrade Your Kickback Protection?
🔍 Take your shop safety to the next level with these carefully selected products. Click on any highlighted item to check current pricing and availability. These tools will help you create safer, cleaner rip cuts you’ll feel good about!
How Pawl Tooth Engagement Really Works
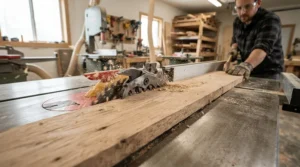
Pawls are a ratchet with a job. Each arm pivots from the splitter or guard, hangs down and slightly rearward, and rides on top of the stock. Push the board forward and the pawl lifts and slides along. Let the board start backward and the arm rotates into the wood, sinking its teeth. One patent describes exactly this: work moves freely in the cutting direction, while backward movement forces the piece into the teeth.
That sounds bulletproof. It isn’t, and pawl tooth engagement is the reason why. Teeth must be sharp, because rounded points slide. Pivots must be clean, because sawdust-jammed arms don’t drop. Geometry matters too. The pawls sit behind the blade, so a short or narrow piece, especially one cut with a miter gauge, can be small enough that the teeth have little to grab. Popular Woodworking noted that the fingers are nearly useless on stock under about 6 inches wide when crosscutting with a miter gauge, and can interfere with a push stick.
Thin kerf blades are another wrinkle. Forum users report removing pawls when using them because the hardware is built around standard-kerf geometry. Check your manual.
Practical check, with the saw unplugged: lift each pawl and let go. It should drop firmly under its own weight or spring. Run a safe finger across the points; if they feel glassy-smooth instead of toothy, they are due for replacement.
Roller Bearing Tension: Where the Holding Power Comes From
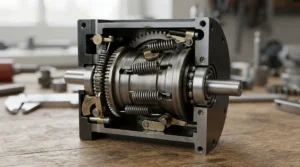
If pawls are a ratchet, rollers are a clutch. The one-way bearing lets the wheel spin forward and locks it in reverse, but it’s spring pressure that makes the lock matter. Roller bearing tension is the force pressing the wheel into the stock, and it’s what converts “free-wheeling” into “holding.”
Maker specs for the Compass RG-2 list adjustable holding force of 70-100 N, roughly 16 to 22 pounds. Fine Woodworking’s setup description is refreshingly simple: touch the rollers to the side of the workpiece, lock them, then use the dial to set pressure. The JessEm Clear-Cut TS Stock Guides use spring-loaded roller arms in the same spirit.
How much is enough? Based on the mechanics, there are two failure modes. Too little pressure, and the stock chatters or slips sideways, so the wheel can’t lock when it matters. Too much, and feeding becomes a wrestling match. That drag tempts you to shove harder, which is the habit that moves hands toward the blade. This is reasoning from how the parts work, not a lab result.
A sensible target: enough pressure that the board stays firmly against the fence and table without needing more than a normal push. Keep rollers on the infeed and outfeed sides, as reviewers describe for the JessEm setup, rather than hovering beside the blade.
Feed Direction Control: The Quiet Hero of Kickback Safety
Both systems depend on feed direction control, but they exercise it differently. Pawls only control the fore-and-aft axis. They let wood advance and resist retreat. Rollers add a second axis. Their angled mounting, such as the 5-degree angle JessEm lists for its router-table guides, steers stock sideways toward the fence while it moves forward.
That second axis matters because a board drifting away from the fence is a common starting point for trouble. Rollers address the drift; pawls address the consequence.
Here’s the catch: a one-way roller installed backward fights you. The Compass RG-2 can be reversed by flipping the body, which is convenient but also means direction must be confirmed every time. Before the first cut, with the machine off, pull a scrap board forward and then backward through the guide. It should glide forward and grip hard in reverse.
For pawls, the direction check is the opposite: the teeth should trail rearward and bite when the board retreats. If you can slide stock backward under a pawl easily, something is wrong.
Roller vs Pawl Kickback Prevention: Head-to-Head
On roller vs pawl kickback prevention, the cleanest way to think is “prevent” versus “restrain.”
Preventing: where rollers lead
Rollers work before a violent event. Keeping stock tight to the fence and down on the table reduces the wandering that leads to a catch. One forum participant explained the purpose bluntly: keep wood tight to the fence and moving forward so it can’t twist into the blade. Fine Woodworking’s reviewer said you can push workpieces forward without fear of wandering or kickback.
Restraining: where pawls lead
Pawls only act after reverse movement starts. That’s still valuable, because kickback is a major injury driver. A Nationwide Children’s Hospital analysis of 1990-2007 data, reported by OH&S, found kickback the most common documented injury mechanism at 72 percent, with 86 percent of injuries to fingers or thumb.
The skeptics’ view
Not everyone is sold on rollers. One forum voice argued they can create false confidence, noting that the violent type of kickback is not always the gentle drifting type rollers address. Another said a well-aligned splitter is enough for them. Wikipedia makes a related point about featherboards: they can reduce the risk of kickback developing but won’t restrain a board if one occurs. Maker claims for one-way rollers are stronger, but they remain claims.
Takeaway: choose rollers for control, pawls for backup, and a riving knife for the foundation.
Anti Kickback Device Comparison: Pawls, Rollers, Featherboards, and Riving Knives
A fair anti kickback device comparison includes the alternatives, because the best protection is usually layered.
| Device | Prevents Drift | Restrains After Kickback | Non-Through Cuts | Best For |
|---|---|---|---|---|
| Pawls on guard or splitter | No | Yes, if teeth engage | No | Standard through rips with OEM guard |
| One-way roller guides | Yes | Maker-claimed | Yes | JessEm Clear-Cut FLEX Stock Guides on varied fences |
| Featherboard | Yes | Generally no | Yes | BOW FeatherPRO FP1 for budget fence pressure |
| Riving knife | Prevents pinch | No | No | Every rip on a compatible saw |
The BOW FeatherPRO FP1 deserves a note. Its EVA feathers and living-hinge design come with a manufacturer claim of five times greater kickback resistance than plastic or wood feathers. That is promotional language, not independent testing, but it shows how featherboards are trying to close the gap with rollers.
Look at the pattern in the table: only the riving knife addresses the pinch itself, and only pawls and rollers (per makers) address a board that is already moving backward. No single device covers every column. Rollers and featherboards share fence control, but rollers add the reverse lock. Pawls and riving knives share a limitation: neither works on non-through cuts.
Choosing Between Pawls and Rollers: A 6-Step Decision Guide
Choosing between pawls and rollers gets easier when you run a checklist.
- Confirm your riving knife or splitter first. It handles pinch kickback, which neither pawls nor rollers fix.
- Identify the cut type. Through cuts can use pawls and rollers. Non-through cuts rule out pawls.
- Check stock width. Narrow stock reduces pawl reach, and very thin strips force rollers off.
- Check mounting. Rollers need a T-slot, T-track, or sacrificial fence. Confirm your slot dimensions before ordering.
- Be honest about maintenance. Pawls need cleaning and sharp points. Rollers need correct direction and pressure.
- Match budget to frequency. Occasional rips justify a budget roller like the POWERTEC 71935N. Daily rips justify metal.
If you land on “both,” that’s a legitimate answer. Rollers handle control; pawls, where your saw provides them, handle backup.
Common Mistakes When Buying Anti-Kickback Gear
- Treating rollers as a riving knife substitute. They solve different problems.
- Buying without checking slot size. Reports show miter-bar fit varies between machines.
- Ignoring pawl condition. Worn teeth give false comfort.
- Cranking tension to maximum. Heavy drag changes how you push.
- Forgetting direction checks. A backward one-way roller works against you.
- Leaving rollers on thin rips. Reviewers note removing guides for thin strips.
- Assuming pawls fit every cut. They don’t work for non-through cuts, and may not suit thin kerf blades.
Setup and Maintenance Guide: Your First 30 Days
Week one: install and verify. With the saw unplugged, mount rollers on the infeed and outfeed sides. Touch the rollers to the stock, lock, then set pressure. Pull a scrap forward and backward to confirm the lock direction.
Week two: build a routine. Before each session, drop-test pawls and check roller spin. Brush sawdust from pawl pivots. Confirm the riving knife is aligned with the blade, because one forum report showed an offset knife blocking feed.
Weeks three and four: refine. Note whether you needed to remove guides for thin strips, and keep a sacrificial fence handy if using the JessEm Clear-Cut FLEX Stock Guides. Inspect pawl points; if they look rounded, replace the set, such as the SawStop Anti-Kickback Pawls for compatible models.
Optimization tricks the listings skip: use a dedicated “roller board” scrap for direction tests, and keep one spare pawl set on the shelf so you never run without. Never do this work with the saw plugged in.
Real-World Scenarios: Three Shops, Three Answers
The weekend builder. Imagine a hobbyist with a contractor saw, a T-track fence, and a few projects a month. The POWERTEC 71935N is a low-cost trial, and the riving knife stays the priority.
The joinery-heavy shop. Picture a woodworker running repeat profiles on a router table and rips on a table saw. The Compass RG-2‘s miter-slot mount covers both machines, and the dial makes pressure repeatable. Fine Woodworking’s praise for rollers on molding cuts supports this match.
The cabinet saw owner. Consider someone with a SawStop cast-iron saw and pawl-equipped guard. The SawStop TSI-SLD insert and fresh pawls keep the system healthy, while the JessEm Clear-Cut TS Stock Guides add fence control on long rips.
None of these scenarios says “buy everything.” Each says: fix the foundation, then add what matches your cuts.
Long-Term Cost and Maintenance
Rollers cost more upfront but fewer times. A roller guide at around $100 used for, say, 50 sessions a year over five years works out to about 40 cents a session (a hypothetical, but the arithmetic is easy to adapt). Pawls are cheap to replace, but they wear and need attention, so their cost is time and vigilance.
Premium aluminum guides such as the JessEm Clear-Cut TS Stock Guides suggest durability through materials, though no long-term durability data turned up. Polymer options like the JessEm Clear-Cut FLEX Stock Guides trade heft for price. Inserts like the SawStop TSI-SLD are consumables in the sense that you may eventually want another for different blades.
The honest total-cost view: a modest roller guide plus a spare pawl set costs less than most shops spend on blades in a year, and either one can prevent an injury worth far more. Maintenance is the hidden variable. A neglected premium guide is worse than a tended budget one.
Safety, Standards, and What the Injury Data Says
Injury research keeps landing on the same lesson: blade contact matters, and so does securing the workpiece. A NIOSH-described study of Ohio wood product manufacturing workers’ compensation claims examined 716 saw-related cases. It concluded that preventing blade contact remains important but securing the workpiece to prevent kickback is also important. That supports the layered approach this guide recommends.
Regional practice differs. Popular Woodworking notes European saws can’t carry anti-kickback fingers because of riving knife dynamics, and owners in other countries report relying on riving knives rather than pawls. That doesn’t make pawls wrong. It shows that no single design is universal.
Practical rules: follow your saw’s manual, use blades matched to your riving knife’s thickness, stay out of the line of fire behind the blade, and treat every device here as a supplement to technique. This article is general information, not a safety certification. For the pawl system vs roller system for kickback safety decision, the manual and a qualified instructor outrank any review.
FAQ
❓ Do anti kickback pawls work with thin kerf blades?
❓ Can I use roller guides and pawls on the same cut?
❓ Are one-way roller guides worth it on a router table?
❓ How often should anti kickback pawls be replaced?
❓ Is a roller system a substitute for a riving knife?
Conclusion
So, who wins the pawl system vs roller system for kickback safety? Nobody, and that’s the useful answer. Pawls are a ratchet-style backup that depends on sharp teeth, clean pivots, and a through cut. Rollers are a control system that keeps stock tight and gives you feed direction control on both axes. A riving knife sits underneath both as the foundation.
For most hobby shops, a riving knife plus a roller guide covers the most ground: start with the JessEm Clear-Cut FLEX Stock Guides for flexibility or the POWERTEC 71935N for a budget trial. Multi-machine shops should weigh the Compass RG-2, and daily fence rippers may justify the JessEm Clear-Cut TS Stock Guides. If your saw already runs pawls, keep them sharp, replace worn sets like the SawStop Anti-Kickback Pawls, and consider a pawl-friendly insert like the SawStop TSI-SLD.
Verify fit, check direction, set tension sensibly, and keep your hands where they belong.
Recommended for You
- Anti Kickback Pawls For Table Saw: 7 Smart Picks For 2026
- Aftermarket Anti Kickback Pawls Under $60: 7 Smart Picks (2026)
- Blade Guard For Bandsaw And Table Saw Combo Shop: 7 Best Picks 2026
Disclaimer: This article contains affiliate links. As an Amazon Associate, I earn from qualifying purchases. If you purchase products through these links, we may earn a small commission at no additional cost to you.
✨ Found this helpful? Share it with your friends! 💬🤗
