
In This Article
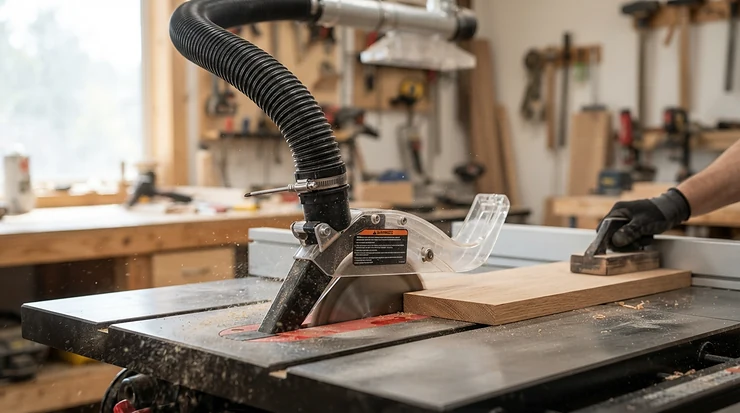
What are top rated blade guards for jobsite table saws? They are the clear covers, splitter-mounted assemblies, and quick-attach safety systems that shield the spinning blade above the table while still letting you see the cut. The best ones are built to survive a portable saw’s real life: truck beds, stair carries, sawdust, and the occasional drop.

Here’s the uncomfortable truth. The guard is the first accessory most crews abandon. It blocks the view, it snags the stock, and if it takes a wrench to remove, it ends up in a bucket somewhere. That’s a problem, because the U.S. Consumer Product Safety Commission has estimated tens of thousands of medically treated blade-contact injuries each year, including roughly eleven amputations a day, based on its 2007-2008 study.
So the goal of this guide is simple. We’ll look at seven guard systems that earn their spot on a portable saw, judged on the things that decide whether a guard stays on: how fast it attaches, how well you can see through it, and whether it still works after months of loading and unloading.
Two honest notes before we start. First, most of these guards ship bundled with a saw, so some “picks” are really guard systems you evaluate when choosing a saw, or parts you verify for fit. Second, everything here comes from published specs and aggregated review sentiment, not hands-on testing. Where evidence is thin, I’ll say so.
Whether you’re hunting a portable saw blade guard upgrade, a jobsite table saw safety accessory, or just a compact blade guard for transport, the comparison below is your shortcut.
Quick Comparison: Top Rated Blade Guards for Jobsite Table Saws
| Guard System | Type | Attach Method | Dust Port | Price Range (Saw or Accessory) | Best For |
|---|---|---|---|---|---|
| SawStop JSS PRO Guard | Bundled polycarbonate guard | Quick-release with riving knife | Yes, active collection | About $2,000-$2,300 (full saw) | Maximum safety, cleaner air |
| DEWALT Site-Pro Guard | Splitter-mounted modular guard | Lever release, no tools | Yes, 1-1/2″ on guard | High-hundreds range (saw and stand) | Fast swaps, rolling-stand crews |
| Bosch Smart Guard | Three-part modular system | Tool-free, tilt-up halves | No dedicated guard port reported | About $500-$700 (saw) | Lightweight, carry-it-yourself work |
| RIDGID R4514 Guard | Tool-less modular guard | Single-lever action | Saw port only | Around $300-$400 (saw) | Budget-conscious builders |
| Makita 2705X1 Guard | Cam-lock modular guard | Tool-less cam lock | Saw port only | Mid-$500s to high-$700s (saw bundle) | Big rip capacity, clear blade view |
| Shark Guard | Aftermarket guard and splitter | Single mounting block | Optional dust ports | Mid-$200s for some packages | Upgrading an older saw |
| MJ Splitter SteelPro | Splitter only (no guard) | Drilled into insert | No | About $25-$50 | Cheapest kickback protection |
Looking at the table, the SawStop JSS PRO Guard wins on integration, but you pay for the whole saw, while the RIDGID R4514 Guard wins on entry price. The MJ Splitter SteelPro isn’t a guard at all, which is exactly why it’s here: it shows how far a small spend can go when your saw has no riving knife. If your priority is an affordable portable saw blade guard upgrade, start with the two lowest rows.
💬 Just one click — help others make better buying decisions too!😊
Top 7 Blade Guards for Jobsite Table Saws: Expert Analysis
1. SawStop JSS PRO Guard — dust-collecting guard that travels with the saw
The headline feature is dust capture. This polycarbonate guard has a port for a shop vac and uses blade turbulence to pull dust from above the table, so it shields your fingers and your lungs. It also extends about an inch past the right side of the blade, a small dimension that matters when your hand drifts on a rip.
The guard lives in the saw’s onboard drawer alongside the riving knife and miter gauge. In practice, that means it rides with the saw instead of rattling loose in the truck, which is the single best predictor of whether a guard actually gets used. The saw weighs roughly 84 lbs, so plan on the cart for any real distance.
Based on the spec comparison, this is the benchmark for guard design on a portable saw. The catch is that you generally get it bundled with a premium saw, so if you’re shopping the guard alone, confirm replacement-part availability with the manufacturer first.
Review sentiment: retailer feedback leaned toward praise for quick blade-height and tilt adjustments and clear setup instructions. Guard-specific complaints were thin, so treat that as limited evidence, not a verdict.
Pros:
- ✅ Active dust collection above the table
- ✅ Onboard storage keeps the guard with the saw
- ✅ Clear polycarbonate with a wider right-side reach
Cons:
- ❌ Mostly bundled with an expensive saw
- ❌ Saw weight demands the cart for long moves
Price: the full saw-and-cart package sits around $2,000-$2,300 at the time of research; check current price. Verdict: pricey, but the guard is part of a saw whose brake is the real headline.

2. DEWALT Site-Pro Guard — tool-free swap between guard and riving knife
Here’s the trick: you raise the blade fully, pull a release lever at the left end of the table, and slide the guard-and-splitter assembly or the plain riving knife in or out. The anti-kickback pawls snap on separately. No wrench, no scavenger hunt.
That matters for jobsite saw portability because the guard stays modular instead of fused to the saw. Earlier DEWALT models reportedly blocked thin rips, and reviewers noted this design fixed that interference. The guard also carries a 1-1/2″ dust port in addition to the saw’s main 2-1/2″ port, which is useful when you hook up two vacuums.
My analytical take: this is the sweet spot for crews who swap between through-cuts and non-through-cuts all day. Reviewers consistently describe the dust collection as average, improving when a second vacuum feeds the guard, and one review called the onboard guard storage a bit flimsy.
A related variant adds a “Guard Detect” switch that flashes a warning if you start the saw without the guard. That’s a smart nudge for anyone who knows they’ll forget.
Pros:
- ✅ Lever-release swap needs no tools
- ✅ Dual dust ports for two-vacuum setups
- ✅ Handles narrow rips better than older designs
Cons:
- ❌ Dust control is only average
- ❌ Guard storage feels flimsy to some reviewers
Price: saw-with-stand packages generally land in the high-hundreds range; prices may vary. Verdict: strong value if you want a tool-free system without premium-saw money.
3. Bosch Smart Guard — lightest three-part system, easy to flip up
Bosch’s setup splits protection into three parts: a riving knife, removable anti-kickback pawls, and a guard whose two halves move independently. When you need an open view of the blade, you tilt the guard assembly up and out of the way. That design reportedly made it one of the first guards carpenters didn’t throw away.
The practical meaning: you can run through-cuts with everything on, then pop the guard up for fussy setups without losing the knife. The GTS1031 version also carries its accessories on the saw, and ToolGuyd’s review highlights the saw’s portability, small enough to haul with one hand.
Where it asks for caution is fit and finish. One carpenter-focused review noted that the splitter on the older 4100 wasn’t perfectly snug even when locked, so check play in the knife before every day’s work.
Aggregated sentiment: reviewers repeatedly call the guard unobtrusive, and several appreciate how easy it is to take off and put back, which keeps it in use.
Pros:
- ✅ Guard halves swing independently
- ✅ Tilts up for open-blade visibility
- ✅ Fits lighter, carry-it-yourself saws
Cons:
- ❌ Reported splitter play on older models
- ❌ No dedicated guard dust port found
Price: the saws run roughly $500-$700 at time of research; check current price. Verdict: excellent for compact saws where weight and quick-attach guards decide the purchase.
4. RIDGID R4514 Guard — budget single-lever guard with onboard parking
The standout is the single-lever action: the guard attaches or releases in one move, and the riving knife follows the blade up and down. The pawls come off separately, so you’re not committing to all-or-nothing safety.
For jobsite saw portability, the onboard storage for the guard assembly and pawls is the real win. A guard you can park on the saw is a guard that doesn’t get left in a garage. The saw also ships with the TSUV rolling stand and lifetime service with registration, which makes the system forgiving on a tight budget.
Reviewer sentiment is mixed. One tool-review site praised how easily the guard parts go back on, while a deal-forum commenter said the guard, knife, and pawls felt fiddly, tempting people to skip them. Another user reported a riving knife misaligned with the blade, a reminder to check alignment before the first cut.
This model has reportedly been succeeded by the R4550, so verify what’s currently sold.
Pros:
- ✅ One-lever guard release
- ✅ Onboard storage for guard parts
- ✅ Very friendly entry price
Cons:
- ❌ Mixed reports on ease of reinstalling parts
- ❌ Some owners reported riving knife alignment issues
Price: around $300-$400 in recent deal listings; prices may vary. Verdict: great value if you inspect alignment right away.
5. Makita 2705X1 Guard — cam-lock guard with side guards for fence setup
The cam-lock design lets you install or remove the guard assembly without tools, and adjustable dual side guards make it easier to measure from blade to fence. Makita also designed the guard for a clear view of the blade as it meets the stock.
That riving knife adjusts to three positions, covering through, non-through, and dado cuts, and does it without removing the throat plate. In practical terms, you’ll change setups faster, and faster setups mean fewer shortcuts. The blade also sits enclosed beneath the table during transport, a thoughtful touch for guard durability during transport.
This is the right pick if you rip lots of sheet goods. The saw offers a 25″ rip capacity and cuts 4x material in one pass. The tradeoff is bulk: listings with the stand show a hefty shipping weight.
Aggregated review sentiment praises precision and a smooth-gliding fence, though some buyers voiced fence complaints, so check yours during setup.
Pros:
- ✅ Tool-less cam-lock guard installation
- ✅ Three-position riving knife without removing the insert
- ✅ Blade stays enclosed in transit
Cons:
- ❌ Heavy with the stand attached
- ❌ Some fence complaints from buyers
Price: mid-$500s to high-$700s depending on the stand bundle; check current price. Verdict: a pro-leaning value for crews who want tool-free adjustments and big rip capacity.
6. Shark Guard — premium aftermarket guard with optional dust shroud
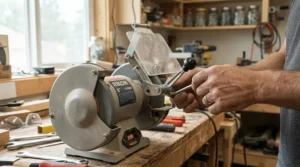
If you’re after a portable saw blade guard upgrade for an older saw, this is the name that keeps surfacing. It’s built from thick Lexan, reportedly about 70% thicker than one reviewer’s stock guard, and mounts through a single block. Optional dust ports let a vacuum pull straight from the guard housing.
Why that matters: cleaner stock and a guard that stays out of your way mean you’re less tempted to remove it. Forum users repeatedly praise it, with one calling it a genuinely well-considered design.
Now the caveat, and it’s a big one. The company’s fit list centers on specific saws, and I couldn’t confirm which jobsite models are supported. One user also reported the lower front plastic can snag stock as it’s first fed. Call the maker with your exact saw before you spend a dime.
For overhead guards, the Shark S-10 requires an L-shaped rear rail and larger rip capacities, so it isn’t a fit for most compact jobsite saws.
Pros:
- ✅ Thick Lexan with optional dust ports
- ✅ Single mounting block installs quickly
- ✅ Strong word-of-mouth among owners
Cons:
- ❌ Jobsite-saw fit isn’t guaranteed
- ❌ Front edge can snag stock, per one user
Price: some full packages run in the mid-$200s range, with splitter-only options cheaper; prices may vary. Verdict: worth it if the maker confirms your saw is supported.
7. MJ Splitter SteelPro — the cheapest kickback insurance on the list
This one isn’t a guard, and I want to be upfront about that. It’s a splitter that installs in a zero-clearance insert, with a stainless steel core inside a tough ABS shell and a “kerf keeper” that helps stop reactive wood from pinching the blade.
For a jobsite table saw safety accessory, this is the budget-first move for saws that lack a riving knife. Here’s the catch: it fits only a flat 90° setup, since the splitter doesn’t tilt with the blade. It also needs a drilled insert, and one forum user found phenolic inserts harder to drill than HDPE.
Reviewer sentiment is mixed. Some call it a cheap way to make a saw safer, while another reviewer returned it. Older forum posts also mention splitters pulling out of their holes, so check tightness often.
Choose the thin-kerf (orange) or full-kerf (blue) version to match your blade.
Pros:
- ✅ Very low cost for real kickback protection
- ✅ Mini-featherboard effect reduces burning
- ✅ Steel core adds durability
Cons:
- ❌ Not a blade guard
- ❌ Works only for 90° cuts
Price: roughly $25-$50 depending on kerf version; check current price. Verdict: smart for an older saw with no riving knife, pointless if your saw already has one.
Practical Usage Guide: Setting Up and Maintaining Quick-Attach Guards
Quick-attach guards only work if you treat them like part of the saw, not an optional hat. Here’s a routine that fits a real jobsite.
Setup in five steps:
- Unplug the saw and raise the blade to full height.
- Seat the riving knife or splitter and confirm it clicks fully into place.
- Lay a straightedge against the blade and knife to check alignment before you attach the guard.
- Snap the pawls and guard on, then lift and drop the guard to confirm it moves freely.
- Plug in, test with scrap, and listen for rubbing.
Maintenance schedule: wipe the guard weekly with a soft cloth, because sawdust and pitch cloud clear plastic fast. Every month, check that levers move smoothly and that mounting points aren’t sloppy. After any drop, recheck alignment.
First-30-day mistakes to avoid: skipping the alignment check, storing the guard loose in the truck, and removing the guard “just for one cut” and never reinstalling it. Reviewers who specialize in portable saws, like Jobsite Table Saw Basics at Fine Homebuilding’s sister publication JLC, stress practical setup habits over gadgetry. Treat the guard as a habit, and the quick-attach guards will pay you back.

Real-World Scenarios: Which Guard Fits Which Crew?
Scenario 1: The trim carpenter who loads the saw twice daily. Budget is flexible, but weight and speed aren’t. The Bosch Smart Guard or DEWALT Site-Pro Guard fits because the guard stays modular and flips out of the way fast. Expect to spend a few hundred to the high-hundreds on the saw package.
Scenario 2: The weekend deck builder. Rare use, tight budget, big safety stakes. The RIDGID R4514 Guard gives onboard storage at the lowest entry price in this guide. Do the alignment check on day one.
Scenario 3: The remodeler with an older saw and no riving knife. Buying a new saw might not make sense. The MJ Splitter SteelPro gives immediate kickback protection for 90° cuts at roughly $25-$50, and the Shark Guard is the fuller upgrade if the maker confirms fit.
Scenario 4: The shop owner buying for a crew. Safety culture and dust control are the goals. The SawStop JSS PRO Guard pairs a guard with brake technology, and the Makita 2705X1 Guard suits crews cutting sheet goods daily.
Match the guard to your habits, not your aspirations. The best guard is the one your crew keeps on.
How to Choose Top Rated Blade Guards for Jobsite Table Saws
- Check how it attaches. Tool-free levers and cam locks beat wrenches. If it takes a tool, it’ll get skipped.
- Look at visibility. Clear polycarbonate or Lexan with independent side guards lets you see the cut without hunting for a gap.
- Confirm riving knife compatibility. Your guard should work with, not instead of, a riving knife.
- Weigh dust collection. A guard port is worth having if you hook up a vacuum; skip it if you don’t.
- Plan for storage. Onboard parking spots prevent the “left it at the shop” problem.
- Verify fit and parts. Match brand, model, and kerf width, and confirm replacement parts exist.
- Inspect warranty terms. Check how aftermarket changes interact with manufacturer coverage.
Based on the spec comparison, steps one, two, and five decide whether a guard survives real use. Reviewers consistently report that complicated guards end up in the toolbox.
Portable Saw Blade Guard Upgrade: Factory vs Aftermarket vs Splitter-Only
| Option | Benefits | Trade-offs | Best For |
|---|---|---|---|
| Factory-integrated (DEWALT Site-Pro Guard, Bosch Smart Guard) | Designed for your saw, onboard storage | Limited to your saw’s design | New saw buyers |
| Aftermarket guard (Shark Guard) | Thicker material, dust options | Fit uncertainty on jobsite saws | Older saws |
| Splitter only (MJ Splitter SteelPro) | Low cost, quick install | No guard, 90° cuts only | Saws without a riving knife |
| No guard | Zero setup | Maximum risk, rule violations on worksites | Nobody |
Factory systems win on convenience, because they’re engineered around your saw’s mounting points. Aftermarket options win when your saw’s stock guard is the problem, but the fit question is non-negotiable. A splitter helps, but it solves kickback, not blade contact, so treat it as a first step rather than the finish line.
Jobsite Table Saw Safety Accessory: A Guard Is Only One Layer
A guard stops accidental contact from above. A real jobsite table saw safety accessory strategy stacks layers.
- Riving knife: keeps the kerf open so wood doesn’t pinch the blade.
- Anti-kickback pawls: bite into stock if it starts to rise.
- Push sticks and push blocks: keep your hands off the table near the blade.
- GFCI power and a stable stand: reduce electrical and tipping risks on messy sites.
That mix matters because a guard can’t stop kickback by itself, and a splitter can’t stop your hand from touching the blade. Reviewers who handle portable saws often point out that sites with the saw on uneven ground or cluttered spaces create the conditions for mistakes. Set the saw on flat ground, clear the area, and keep a push stick within reach before you start the motor.
Compact Blade Guard for Transport and Jobsite Saw Portability
The words “compact blade guard for transport” sound like a luxury until you’ve watched a guard snap off in the truck bed. Compactness is really about three things.
First, profile: a guard that folds, tilts, or detaches cleanly will fit the saw’s body without sticking out. Second, storage: onboard parking, like on the RIDGID R4514 Guard or SawStop JSS PRO Guard, keeps parts together. Third, weight: the lighter the saw, the easier it is to carry it with the guard attached or stowed.
For jobsite saw portability, Bosch Smart Guard designs lean into this logic, with the guard stored on the saw and the saw light enough to carry. The Makita 2705X1 Guard takes a different route, enclosing the blade beneath the table during transport. Neither is “better,” but they suit different habits: carry-and-go versus load-and-roll.
If you move the saw across multiple floors daily, weigh the saw first and the guard second.
Guard Durability During Transport: What Actually Breaks
Guard durability during transport comes down to a few failure points. Clear plastic scratches and fogs, pawls bend, levers loosen, and loose parts disappear. Here’s how the options stack up on paper.
- Thick polycarbonate or Lexan resists cracking better than thin plastic, which is a selling point of the Shark Guard and SawStop JSS PRO Guard.
- Onboard storage protects parts from impact, but reviewers noted the DEWALT Site-Pro Guard storage felt a bit flimsy.
- Metal-core splitters, like the MJ Splitter SteelPro, hold up well because there’s little to break.
Practical protection tips: store the guard in its designated spot every time, avoid stacking tools on top of it, and wipe grit away before closing storage. A scratched guard still protects you, but a guard you can’t see through will get removed.
Quick-Attach Guards: Speed vs Stability
Quick-attach guards are the reason this category is finally worth discussing. A system that takes ten seconds to attach gets used, and one that takes ten minutes doesn’t.
But speed has a cost. Levers and cam locks can wear, and any attachment point that moves can eventually develop play. One review noted splitter slop on an older Bosch even in its locked position, which is exactly the kind of wear to check for.
So here’s the rule: speed is great, but verify stability. After each attachment, give the guard a gentle tug and confirm nothing rattles. If you notice looseness, stop and fix it before cutting. In my analysis of the specs, the best quick-attach guards pair fast release with a firm, repeatable seat, which is why alignment checks matter as much as the lever.
Common Mistakes When Buying Blade Guards for Jobsite Table Saws
- Buying for the spec sheet, not your habits. A guard that blocks your view of narrow rips will get removed.
- Ignoring fit. Aftermarket guards must match your saw model; “universal” claims deserve skepticism.
- Treating a splitter like a guard. They’re different tools solving different problems.
- Skipping the alignment check. Misaligned knives cause the very binding they’re meant to prevent.
- Forgetting replacement parts. A cracked guard on a discontinued saw is a headache.
Expert commentary from woodworking forums repeatedly shows the same pattern: people don’t remove guards because they’re reckless, they remove them because the guard is annoying. Pick the least annoying one that fits, and you’ve already won half the battle.
Safety, Regulations, and Compliance Guide
On worksites, guards aren’t just good manners. Federal rules require hand-fed circular ripsaws to be guarded by a hood that fully encloses the portion of the saw above the table and above the material being cut. An OSHRC decision involving workers using an unguarded Bosch 4100 on a worksite shows how seriously inspectors treat it.
Practical takeaways:
- Keep the guard on for through-cuts, and use approved alternatives like featherboards or jigs when a guard can’t be used.
- Document training and keep the manufacturer’s manual with the saw.
- Don’t assume an aftermarket guard automatically satisfies requirements, so ask the manufacturer.
I’m not a lawyer or compliance consultant, so treat this as a starting point and consult your safety officer or local OSHA resources for your jurisdiction.
Long-Term Cost & Maintenance: What You’ll Really Pay
The upfront price isn’t the whole story. Replacement guards, lost parts, and downtime add up. Here’s a value snapshot.
| Option | Price Range | What You Get | Best For |
|---|---|---|---|
| MJ Splitter SteelPro | About $25-$50 | Splitter, kerf keepers, drill guide | Older saws on a tight budget |
| RIDGID R4514 Guard | Around $300-$400 (saw) | Saw with tool-less guard system | Entry-level buyers |
| Bosch Smart Guard | About $500-$700 (saw) | Modular system on a light saw | Carry-it-yourself crews |
| SawStop JSS PRO Guard | About $2,000-$2,300 (saw) | Guard plus brake-equipped saw | Safety-first buyers |
Cost-per-use favors the cheapest solution that you’ll actually keep using. A mid-priced saw with a guard you reattach daily beats a premium saw with a guard left in the shop. On the other hand, if your crew has had close calls, the premium saw’s brake technology may justify the price difference.
Maintenance costs stay low: a microfiber cloth, occasional lubrication for levers, and a replacement guard if the original cracks. Ask the manufacturer about part availability before committing.
FAQ: Blade Guards for Jobsite Table Saws
❓ Can I add an aftermarket blade guard to any jobsite table saw?
❓ Do quick-attach guards loosen over time?
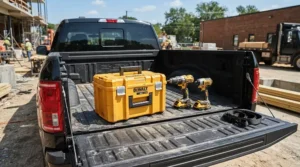
❓ How do I protect a guard from damage in the truck?
❓ Is a splitter enough if I dislike guards?
❓ Will an aftermarket guard affect my warranty?
Conclusion
Here’s the bottom line on top rated blade guards for jobsite table saws: the best guard is the one that stays on the saw. That puts tool-free systems like the DEWALT Site-Pro Guard, Bosch Smart Guard, RIDGID R4514 Guard, and Makita 2705X1 Guard near the top for most crews, while the SawStop JSS PRO Guard earns its slot for buyers who want dust capture and the most safety technology in a portable saw.
If you’re upgrading an older saw, the Shark Guard is promising but demands a fit check, and the MJ Splitter SteelPro is a bargain stopgap that solves kickback only. Remember the layers too: a riving knife, pawls, push sticks, GFCI power, and a stable setup, because a guard on its own is only part of the story.
Quick-attach guards, compact designs, and guard durability during transport all point to the same insight: friction kills safety habits. Choose the guard that removes friction, verify alignment, and keep it on for through-cuts.
Recommended for You
- Splitter System For Dado Cuts: 7 Best Safe Picks For 2026
- Splitter For Table Saw Kickback Prevention: 7 Proven Picks In 2026
- Riving Knife Kit For Older Table Saws Without One: 7 Safe Fixes 2026
Disclaimer: This article contains affiliate links. As an Amazon Associate, I earn from qualifying purchases. If you purchase products through these links, we may earn a small commission at no additional cost to you.
✨ Found this helpful? Share it with your friends! 💬🤗
