In This Article
An overhead blade guard vs riving knife comparison weighs two different table saw protections: a guard that shields the spinning blade from your hands and dust, and a riving knife that sits just behind the blade to stop wood from pinching and launching back at you. One blocks contact. The other blocks kickback.
Most buyers treat them as rivals. They aren’t. They guard against different disasters, and the real question is which safety upgrade to buy first when your budget is finite and your saw is older than your last haircut.
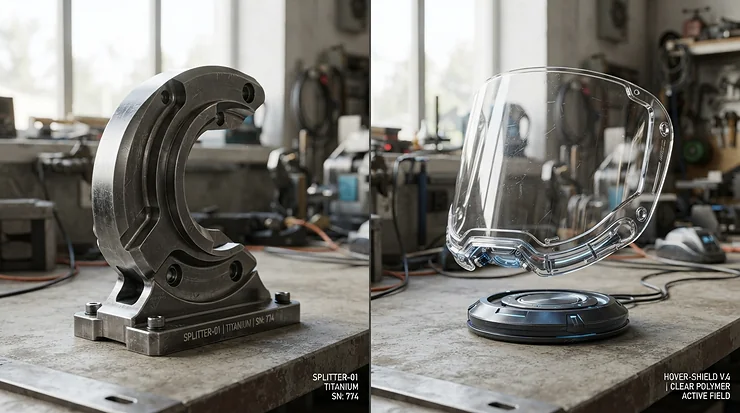
A riving knife is a thin plate that follows the blade up, down, and through tilts, keeping the cut open behind the teeth. An overhead guard hangs above the work, usually on an arm, and covers the blade without touching the kerf at all. That single difference in mounting drives everything else: which cuts each one allows, which injuries each one prevents, and what each one costs you in annoyance.
Here’s the short version. If your saw has no riving knife, that’s your first move. If it has one but you keep ripping with no blade cover, a guard is next. The push block that keeps your hands out of the danger zone belongs in both plans. Below, I’ve compared seven real products across budget, mid-range, and premium tiers. Each one is judged on specs, aggregated review themes, and what the numbers mean at your saw.
Quick Comparison Table: Overhead Blade Guard vs Riving Knife at a Glance
| Feature | Overhead Blade Guard | Riving Knife |
|---|---|---|
| Main job | Covers the blade, reducing hand contact and capturing dust | Keeps the kerf open so wood can’t pinch the blade’s rear teeth |
| Kickback protection | Indirect at best, unless pawls or a splitter are attached | Direct, because it sits inches behind the blade |
| Non-through cuts | Overarm designs stay on; splitter-mounted guards must come off | Stays on, because it sits below the tooth line |
| Best For | SawStop Floating Overarm Dust Collection Guard (TSG-FDC) buyers who want dust capture | RIDGID OEM Riving Knife (089290001711) owners fixing a missing knife |
The table shows the split clearly. A guard is a shield, and a riving knife is a kickback fix. If kickback is what worries you, the riving knife column wins. If you’re also fighting airborne dust, SawStop TSG-FDC is where the guard column earns its price. Most workshops end up wanting both.
💬 Just one click — help others make better buying decisions too!😊
Top 7 Products for Overhead Blade Guard vs Riving Knife Comparison Shoppers: Expert Analysis
1. RIDGID OEM Riving Knife (089290001711) — cheapest kickback insurance on the list
If a replacement part can be a safety upgrade, this is the unglamorous hero. It’s the factory knife listed for the RIDGID R4513, R4516, and R4517 table saws. For a bent, lost, or “temporarily removed” knife, the fix costs about a pizza night.
A riving knife works because its thickness lands between the blade plate and the kerf, so the cut halves slide past it instead of squeezing back onto the blade. OEM matters because the mounting pattern and thickness are matched to the saw. A near-fit knife can sit out of plane with the blade, which defeats the whole point.
This one is for owners of those specific saws, and it only makes sense if yours is damaged or missing. On any other model it won’t fit, so check your manual’s part number before ordering.
On reviews, I couldn’t verify a meaningful pool of independent performance testing for the part itself. Feedback attached to marketplace listings centers on fit and fair pricing, which is about what you’d expect from a steel plate.
Pros:
- ✅ Factory fit for three popular RIDGID models
- ✅ Restores kickback protection for very little money
- ✅ Simple plate with nothing to break or wear out
Cons:
- ❌ Fits only the listed saw models
- ❌ No blade cover or pawls included
Price: under the $60 range at the time of research; check current price. Value verdict: an easy yes if you own a compatible saw.
2. Micro Jig GRR-RIPPER GR-100 — grip that keeps your fingers out of trouble
It isn’t a guard and it isn’t a knife, yet it may do more per dollar than either. The Amazon listing describes the GRR-RIPPER as a two-pack push block with three directions of force: downward, inward toward the fence, and forward.
Those three forces matter for kickback mechanics. A riving knife stops the cut from closing on the blade, but it can’t help a board that drifts away from the fence and wedges against the blade’s front. Inward and downward pressure address that failure directly. The manufacturer says this “virtually eliminates” kickback, which is a marketing claim, so treat it as a strong aid rather than a guarantee.
It’s best for anyone ripping narrow stock, where your hand would otherwise ride close to the teeth. Reviewers consistently praise the grip and control, and the common complaints are the assembly step and the upfront cost compared with a plain push stick.
Pros:
- ✅ Pushes down and sideways at the same time
- ✅ High-friction base holds rough lumber securely
- ✅ Also useful on router tables, jointers, and band saws
Cons:
- ❌ Needs assembly and adjustment before first use
- ❌ Costs more than a basic push stick
Price: well under $100 for a pair; check current price. Value verdict: the best risk reduction per dollar here, though it complements a riving knife rather than replacing one.
3. SawStop Dust Collection Blade Guard (TSG-DC) — one-lever swap between guard and knife
This is the factory-style guard for SawStop cast-iron saws, and its party trick is the switch. The retailer description lists a tool-free, single-lever swap between the blade guard and the riving knife.
The independent lateral sides keep blade exposure low, and the low profile allows cuts as narrow as 3/4 inch. Anti-kickback pawls are included, and a dust port connects to your collection system. In practice, the lever is what makes guards survive in real shops. A guard that takes thirty seconds to remove gets removed, and one that takes three seconds stays in use.
It’s meant for SawStop ICS, PCS, and CNS owners only. Independent review data on this specific guard is thin, so I can’t summarize a verified rating. Forum owners who run SawStop’s factory guard describe preferring it over wider overarm designs, mainly for ripping smaller parts.
Pros:
- ✅ Tool-free lever swap between guard and knife
- ✅ Narrow profile allows cuts down to 3/4 inch
- ✅ Includes pawls and a dust port
Cons:
- ❌ Compatible with SawStop cast-iron saws only
- ❌ Above-table dust capture needs a supported hose
Price: in the $150-$200 range; check current price. Value verdict: strong value for the right saw, and a poor fit for anything else.
4. BORK (Bolt-On Ripping Knife) — a retrofit for saws that never had a knife
Older saws weren’t designed around riving knives, and a true factory knife can’t simply be bolted on. The BORK is the workaround. Reviews describe it attaching to the arbor swing arm, then rising, lowering, and tilting with the blade.
That’s clever, but the geometry is a compromise. Because it rides the swing arm, its path is an arc, so its height relative to the blade shifts slightly. Reviewers suggest setting the knife to the blade height for common board thicknesses, and several note a custom zero-clearance insert is needed.
It’s for owners of compatible older cabinet and hybrid saws who want a knife without buying a new machine. Reviews are mixed. Some owners report years of satisfaction, while others describe frustrating alignment or installation in tight spaces. One owner reported an early open-ended design problem, and later discussion says the maker moved to a closed-slot stainless design. Verify current availability, compatibility, and the version you’d receive before buying.
Pros:
- ✅ Adds a blade-following knife to saws without one
- ✅ Far cheaper than replacing the whole saw
- ✅ Knife can be removed when you don’t need it
Cons:
- ❌ Alignment and install can be fiddly
- ❌ Compatibility is limited and the reviews are dated
Price: older reviews cite roughly the $100-$150 range; check current price and stock. Value verdict: worth considering only after confirming it fits your exact saw.
5. Shark Guard Riving Knife Mounted Guard Package — overhead-style cover that clips to a knife
Shark Guard sits in the middle of the overhead blade guard vs riving knife comparison, because it adds a guard on top of a riving knife. The maker’s package includes the dust-collecting guard, a clamp assembly, and a knife suited to your saw model. The guard mounts on the knife, and the knife stays installed for dado cuts since it sits below the tooth line.
The clear Lexan lets you watch the cut, and an overhead dust port captures spray that under-table collection misses. A Fine Woodworking reviewer of the related ARK version called the guard clear and easy to ride over the workpiece, with the knife adjustable in under thirty seconds.
It suits owners of cabinet and hybrid saws who want a guard and a knife in one purchase. Owners often praise the dust collection and quick removal. One forum voice describes a version feeling wobbly on a 12- or 14-inch saw.
Pros:
- ✅ Clear guard keeps the cut visible
- ✅ Overhead dust port catches spray
- ✅ Removes quickly for jigs and sleds
Cons:
- ❌ Dust capture needs strong suction
- ❌ Exact model fit must be confirmed
Price: roughly the $300-$350 range per the maker’s listing; check current price. Value verdict: a solid all-in-one for saws that lack a good factory guard.

6. SawStop Floating Overarm Dust Collection Guard (TSG-FDC) — true overarm that stays on for non-through cuts
This is the premium overarm in the guard column. The listing describes a heavy-duty 4-inch steel overarm that protects the operator and removes dust in both standard and non-through cuts. The blade cover measures about 3-1/2 by 18-1/2 inches, and the arm swings clear when you need blade access. It fits ICS, PCS, and CNS saws.
Because it hangs from above, it doesn’t depend on the kerf, so non-through cuts like dadoes and rabbets don’t force you to remove it. That’s its real advantage over splitter-mounted guards. It does nothing about kickback by itself, so pair it with a riving knife.
Owners praise the dust capture and say it essentially continues the older Excalibur design. The complaints are price, the wide footprint when ripping small parts, and having to reposition it when you change fence settings.
Pros:
- ✅ Stays in place for non-through cuts
- ✅ Captures most above-table dust
- ✅ Rigid steel arm swings clear
Cons:
- ❌ Premium price for a guard alone
- ❌ Wide footprint is awkward for small parts
Price: in the $600-$650 range at retailers; check current price. Value verdict: justified for dust-conscious cabinet saw owners, hard to defend on safety alone.
7. DEWALT DWE7491RS — a whole saw with knife, guard, and pawls built in
Sometimes the best upgrade is a different saw. The DWE7491RS is a 15-amp, 10-inch jobsite saw with 32-1/2 inch rip capacity and a rack-and-pinion fence. It carries a modular system: a guard attached to a splitter, snap-on pawls, and a separate riving knife.
A tool-free release lever swaps the knife and guard, and a flashing light warns when the blade is unguarded. Contractors at JLC said they normally skip guards on jobsite saws, yet this system was well enough designed that they used the riving knives.
It’s for anyone starting fresh who wants safety features without aftermarket fiddling. Reviewers like the fence and stand but call the guard fiddly to install, and some units are reported to need blade alignment checks. The stock 24-tooth blade is general purpose.
Pros:
- ✅ Tool-free lever swaps knife and guard
- ✅ Knife, guard, and pawls stored onboard
- ✅ Wide rip capacity with a smooth fence
Cons:
- ❌ Guard can feel fiddly to install
- ❌ Blade alignment may need checking
Price: in the $550-$650 range; check current price. Value verdict: good if you need a saw anyway, poor if you only need an upgrade.
Top 7 Comparison Table
| Product | Type | Price Range | Review Signal | Best For |
|---|---|---|---|---|
| RIDGID OEM Riving Knife | Replacement knife | Under $60 | Limited independent data | Compatible RIDGID owners |
| Micro Jig GRR-RIPPER GR-100 | Push block | Under $100 | Strong praise for grip | Narrow rips |
| SawStop TSG-DC | Knife-mounted guard | $150-$200 | Limited independent data | SawStop owners |
| BORK | Retrofit knife | About $100-$150 | Mixed | Older saws |
| Shark Guard Package | Guard plus knife | $300-$350 | Strong owner praise | Dust-conscious users |
| SawStop TSG-FDC | Overarm guard | $600-$650 | Strong on dust | Cabinet saw owners |
| DEWALT DWE7491RS | Complete saw | $550-$650 | Generally positive | New saw buyers |
Looking at the comparison above, the GRR-RIPPER and RIDGID knife deliver the most safety per dollar, while SawStop TSG-FDC is the priciest and mostly buys dust control. Budget buyers should note that BORK carries compatibility and availability risk. And if you’re buying a whole saw anyway, DEWALT DWE7491RS bundles most of the protection in one box.
Blade Guard and Riving Knife Differences: What Each One Actually Does
The blade guard and riving knife differences come down to position, motion, and purpose. A riving knife is behind the blade and moves with it, so the gap stays small at every height and tilt. An overhead guard is above the blade, usually independent of its height, and can stay on for operations the knife can’t handle.
A splitter is the older cousin of the knife. It’s flat like a riving knife but extends above the blade’s cutting height, so a guard can mount to it. The tradeoff is that it must come off for non-through cuts and doesn’t follow the blade as it rises and falls.
| Option | Follows Blade Height | Typical Mount | Non-Through Cuts | Best For |
|---|---|---|---|---|
| Riving knife (RIDGID OEM) | Yes | Behind blade | Stays on | Everyday kickback protection |
| Splitter | No | Fixed behind blade | Must come off | Older saws only |
| Knife-mounted guard (SawStop TSG-DC) | Yes | On the knife | Guard off, knife stays | Fast swaps |
| Overarm guard (SawStop TSG-FDC) | No | Above the table | Stays on | Dust and blade cover |
Based on this comparison, riving knife vs blade guard safety isn’t a contest, since they protect against different events. The knife works on the cut itself. The guard works on your hands and the air you breathe. If you can only afford one, the knife covers the more violent failure mode.
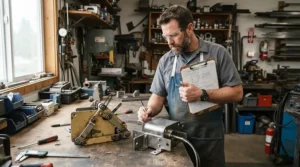
Kickback Mechanics: How a Board Becomes a Projectile
Kickback mechanics are simpler than they sound. The blade’s rear teeth move upward. If the cut halves squeeze back together behind the blade, the board can ride up on those rear teeth and get thrown toward you.
Fine Woodworking’s explanation of kickback and riving knives argues a riving knife is the most effective splitter type because it stays close to the blade at every height and tilt. That matches the mechanical logic: closer means less room for pinching.
There are three common triggers. The first is pinch-back from wood tension or a closing kerf, which the knife addresses. The second is a board wedged between the blade and the fence, usually from a drifting rip, and a knife won’t fix that. The third is dropping stock onto a spinning blade.
Pawls add another layer by biting into a board that starts moving backward. For the fence-wedge trigger, the best defenses are a straight fence setup, a steady feed, and a push block like the GRR-RIPPER. Even a perfect riving knife leaves some risk on the table, which is why combining protections works better than relying on one.
Non-Through Cuts: Where the Two Systems Part Ways
Non-through cuts, like dadoes, rabbets, and grooves, are where guards and knives behave very differently. In a through cut, the blade passes fully through the board and most guard designs work. In a non-through cut, a guard that mounts on a splitter has to come off.
That’s the practical trap. Patent literature describes how users who must remove a guard for non-through cuts, and who find it tedious, often leave it off entirely. A guard that gets left off protects nobody.
A riving knife sits below the tooth line, so it can stay installed for these cuts. Shark Guard notes this for its knife-mounted package, and DEWALT DWE7491RS designs its knife for exactly this purpose. An overarm like SawStop TSG-FDC stays on too, because it hangs above the work.
When you buy for non-through cuts, ask whether the guard can stay on or whether only the knife can. If the answer is “only the knife,” plan your workflow so the knife is always installed. Then the dado you do on a Tuesday doesn’t quietly turn into a no-protection habit.
How to Choose: Overhead Blade Guard or Riving Knife
- Check what your saw already has. If it came with a riving knife, don’t buy a second. Replace it only if it’s bent or missing.
- Confirm exact compatibility. Mounting patterns are saw-specific, so match model numbers before buying.
- List your cuts. Heavy dado and groove work favors a knife or an overarm guard that stays on.
- Decide whether dust is a problem. If it is, an overhead guard with a port earns its cost.
- Check removal speed. Tool-free swaps like SawStop TSG-DC or DEWALT DWE7491RS make guard use more likely.
- Add a push block. A GRR-RIPPER type tool covers the fence-wedge scenario a knife can’t.
The logic behind this order is straightforward. Choose protections you’ll actually keep installed, because a feature that’s off the saw has a safety value of zero.
Which Safety Upgrade to Buy First: A Safety Upgrade Priority Ranking
If you want a clean safety upgrade priority list, here’s mine, based on how each protection works and what the injury data suggests:
Tier 1: riving knife. Without one, nothing else stops the kerf from closing. If your saw lacks one, the BORK or a model-specific replacement like the RIDGID OEM Riving Knife comes first.
Tier 2: push block or push stick. Cheap, immediate, and it keeps your hands out of the blade’s path. GRR-RIPPER is the pick here.
Tier 3: blade guard. A guard like SawStop TSG-DC or Shark Guard covers the blade, and many injuries involve a missing guard.
Tier 4: overarm dust collection. SawStop TSG-FDC is the luxury end. It improves air quality and keeps a guard on for non-through cuts, but it’s the last purchase, not the first.
So when someone asks which safety upgrade to buy first, the answer is the knife if you lack one, then a push block, then a guard. Treat the order as a starting point and adjust for your saw and cuts.
✨ Ready to Upgrade Your Saw’s Safety?
🔍 Take your table saw to the next level with these carefully chosen options. Click any highlighted product to check current pricing and availability. A few smart upgrades can help you build with more confidence and fewer close calls!
Riving Knife vs Blade Guard Safety: What the Injury Data Does and Doesn’t Say
The numbers need careful reading. The CPSC’s 2017 table saw special study estimated 26,500 emergency-department-treated blade-contact injuries and about 6.9 million saws in use. Amputations made up roughly 10.7 percent of those injuries on the NEISS diagnosis.
Note what “blade contact” means. It counts hands touching the blade, which a guard can help prevent, rather than kickback as a separate category. CPSC staff, in later regulatory documents, said most injuries happened on saws without a blade guard installed, and that injured users of saws with modular guards had removed them.
Advocacy group National Consumers League argues the other side: that roughly one-third of injuries still occur with the guard in place. That’s an advocate’s framing, but it reminds us a guard isn’t a force field.
So the honest riving knife vs blade guard safety conclusion is that both help, neither is complete, and the most dangerous configuration is the one where protections get removed. Which one prevents more injuries depends on whether the injury is kickback or direct contact. That’s why layering beats choosing.
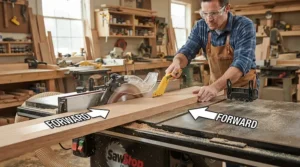
Setup Guide: Installing and Dialing In Your Protection
Good safety gear installed badly is bad safety gear. Follow this sequence.
Step 1: Read your manual first. Spacing and alignment specs vary by saw, and I won’t invent numbers for yours.
Step 2: Check the knife’s plane. A riving knife must line up with the blade, not just sit near it. A BORK-type retrofit especially needs careful screw adjustment, and reviewers mention patience is required.
Step 3: Match knife thickness to the kerf. The knife should be thinner than the kerf but thicker than the blade plate, so thin-kerf blades need a matching knife.
Step 4: Update your throat plate. Reviewers note a closer-fitting knife can call for a new zero-clearance insert.
Step 5: Test the quick-release. On DEWALT DWE7491RS or SawStop TSG-DC, practice swapping a few times with the saw off, so you’re fast when it counts.
First 30 days mistakes to avoid: leaving the knife off “just for this one cut,” skipping alignment checks after moving a jobsite saw, and forgetting to clean a clear guard so you can actually see through it. Check that pawls move freely, and re-check alignment whenever you change blades.
Real-World Scenarios: Matching Upgrades to Your Shop
The weekend builder with an older contractor saw (budget about $200, garage, a few cuts a week). No knife, a rusty splitter. A BORK, if it fits and is available, plus a GRR-RIPPER push block covers the two biggest gaps. Skip overarm guards for now.
The serious hobbyist with a SawStop PCS (budget flexible, dedicated shop, several sessions a week). Fine dust is the nagging problem. SawStop TSG-DC keeps a guard in play, and SawStop TSG-FDC is worth considering if you have shop-wide collection to feed it. Your riving knife is already there, so use it.
The renter or DIYer starting from zero (budget around $600, shared space, occasional use). Don’t assemble parts. DEWALT DWE7491RS brings knife, guard, and pawls in one folding package. Buy a push block with it, and swap the 24-tooth blade when you want cleaner cuts.
The RIDGID R4513 owner whose knife went missing. The RIDGID OEM Riving Knife costs less than a nice dinner. Install it and move on.
The common thread: match the upgrade to your actual gap, not to the most impressive product on the list.
Problem to Solution: Fixing the Frustrations That Make People Remove Guards
Problem: “The guard gets in the way.” Solution: use a knife-mounted guard with fast removal, like SawStop TSG-DC or Shark Guard, so taking it off for a jig takes seconds instead of minutes.
Problem: “Dust blows into my face.” Solution: an overhead port, either Shark Guard with strong suction or SawStop TSG-FDC with a dedicated line. Both need real airflow to work well.
Problem: “Narrow rips feel scary.” Solution: a low-profile guard allowing cuts around 3/4 inch, plus a GRR-RIPPER so your hands never ride along the blade.
Problem: “The knife binds or scrapes.” Solution: check thickness against the blade’s kerf and re-align the knife’s plane before blaming the wood.
Problem: “I need to cut a dado.” Solution: leave the knife installed, remove the guard if needed, and use an overarm like SawStop TSG-FDC if you want cover during non-through cuts.
Long-Term Cost, Maintenance, and Regulatory Context
Spread over years of use, the cost question shrinks. A knife that costs about the price of a dinner and a push block under a hundred dollars protect every cut for the life of the saw. A premium overarm costs more per cut simply because it solves a different, less urgent problem.
Maintenance is minor. Wipe clear guards clean, check lever mechanisms, keep pawls moving, and replace anything cracked or bent. Overarm designs have more moving parts than a plate of steel, so expect more tinkering.
The regulatory picture is still moving. The CPSC’s Federal Register notice on blade-contact injuries shows how long this rulemaking has been under discussion, and its status has changed in stages since then. Check the CPSC site for where it stands today. Meanwhile, saws sold in the U.S. since roughly 2008 generally ship with a riving knife.
Total cost of ownership also includes what a mistake costs. By that measure, the cheapest protections here, RIDGID OEM Riving Knife and GRR-RIPPER, offer the strongest return.
FAQ
❓ Can I run an overhead blade guard and a riving knife together?
❓ Does an overhead blade guard stop kickback by itself?
❓ Is a splitter as good as a riving knife?
❓ Can I retrofit a riving knife on an older saw?
❓ Do I need to remove my guard for dado cuts?
Conclusion
The overhead blade guard vs riving knife comparison ends with a clear but nuanced answer. A riving knife is your first defense against the violence of kickback. A guard is your shield against contact and dust. And a push block quietly covers the gap between them.
If your saw has no knife, start with a model-specific part like the RIDGID OEM Riving Knife or a retrofit such as BORK, after confirming fit. Add a GRR-RIPPER next. Then choose a guard that you’ll actually leave installed, whether that’s SawStop TSG-DC, Shark Guard, or the premium SawStop TSG-FDC. If you’re starting from scratch, DEWALT DWE7491RS bundles the basics.
The best protection is the one that stays on the saw, so pick for your real habits, not your best intentions.
Recommended for You
- Overhead Blade Guard For Table Saw Safety: 7 Best Picks (2026)
- Aftermarket Blade Guard Under $150: 7 Proven Picks (2026)
- Top Rated Featherboards For Consistent Rip Cuts: 7 Picks (2026)
Disclaimer: This article contains affiliate links. As an Amazon Associate, I earn from qualifying purchases. If you purchase products through these links, we may earn a small commission at no additional cost to you.
✨ Found this helpful? Share it with your friends! 💬🤗
